How to schedule with Callie over email
Beta
Callie™ is currently in private beta for select users. Sign up for early access.
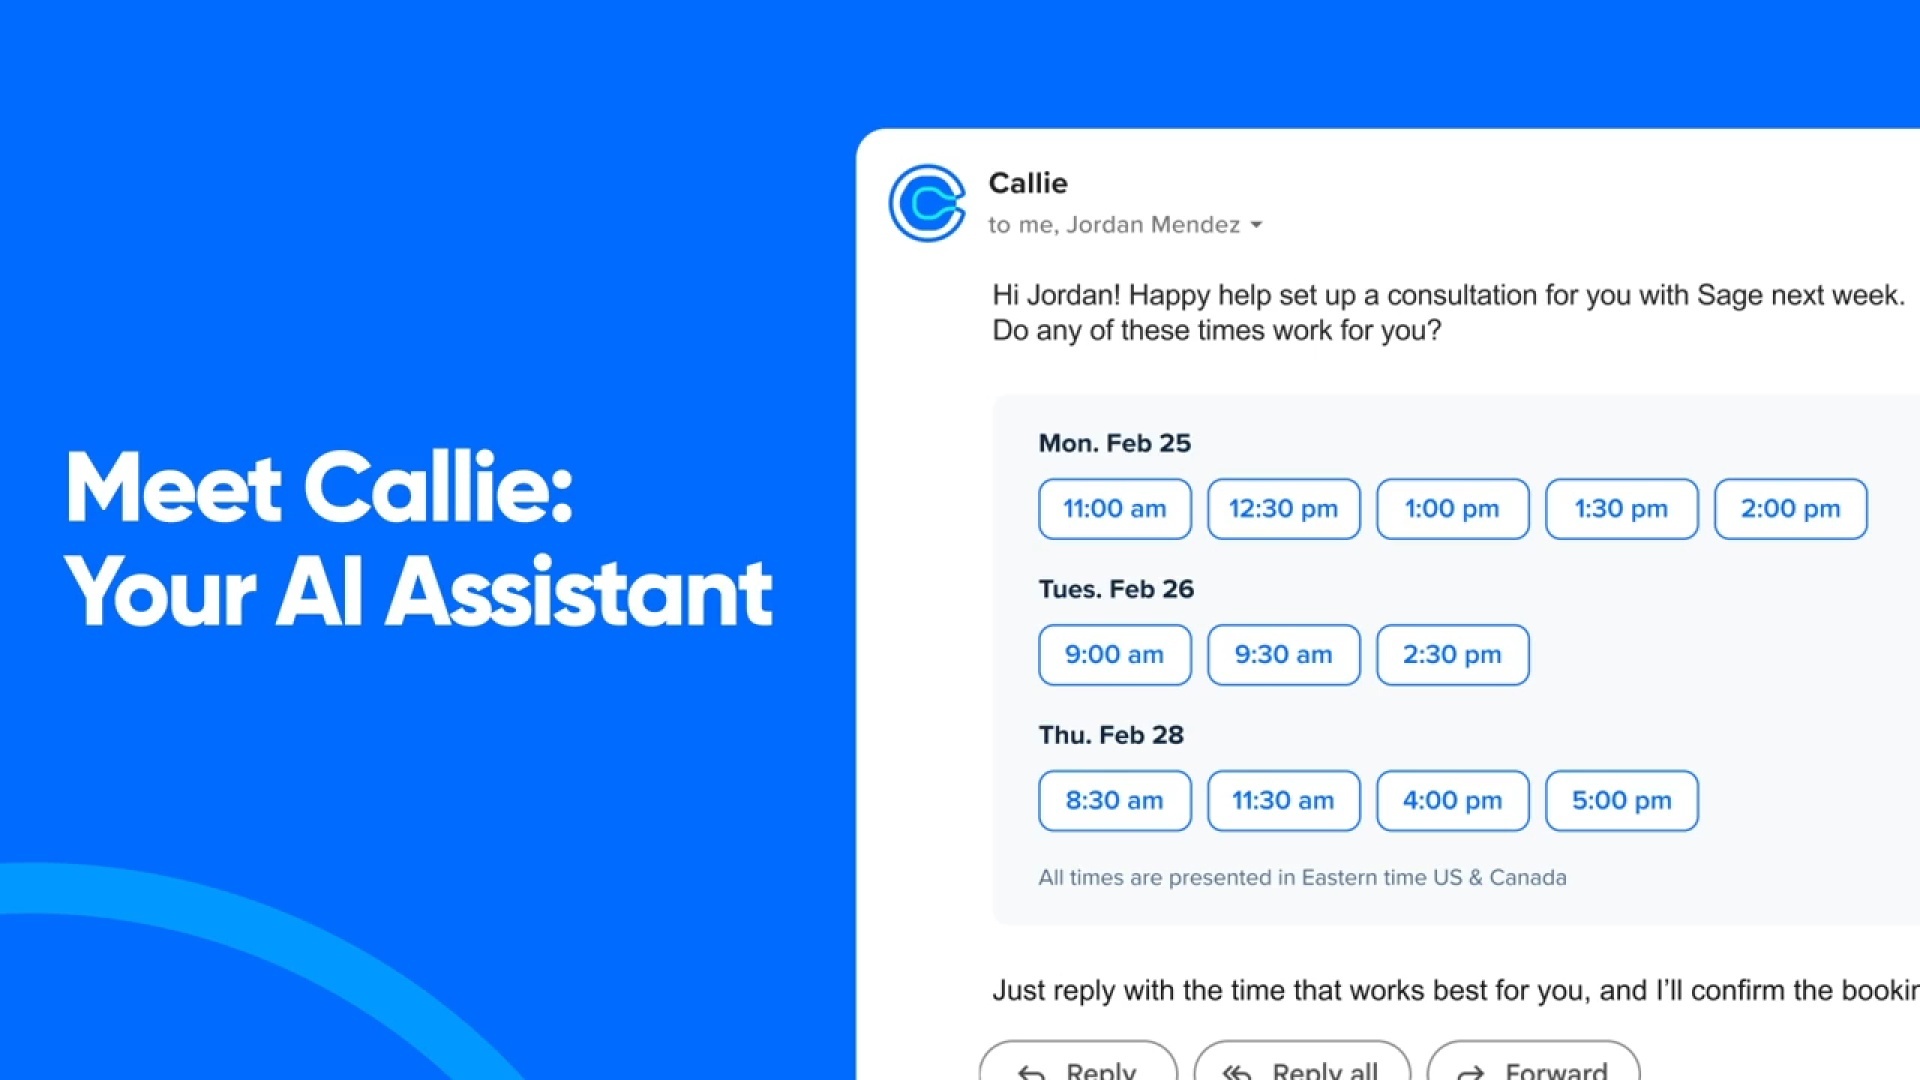

Callie is Calendly's AI assistant. Add Callie to an email to find a meeting time quickly. You don't need to use special formats or templates. Just write naturally, the way you'd talk to a real assistant.
Before you begin
Callie works with the email account that you use to login to Calendly. Send from that email so Callie recognizes and responds to you. This means:
- Shared mailboxes won't work with Callie
- You'll need to send from the same email each time
You'll need:
- A Calendly account with a one-on-one Event Type set up
- Default Event Type settings configured (Callie uses these when you don't specify other details)
Callie vs. a scheduling link
Both Callie and scheduling links save you time. Choose based on your situation.
Callie works best for one-on-one meetings when you’re emailing your invitee, and scheduling links work best for meetings with multiple hosts, group scheduling, or team coordination.
Callie | Scheduling link | |
Use when | You're already emailing with one person about meeting | You have multiple hosts, need group scheduling, use a shared mailbox, or are coordinating with a team |
How it works | Add callie@calendly.com to your email thread (in the address bar) | Share a booking link with the invitee(s) |
What the invitee sees | Available times directly in the email thread | Your booking page with your availability and meeting details |
Best for | Seamless scheduling within ongoing conversations | Self-service booking and complex scheduling scenarios |
Schedule with Callie over email
To schedule with Callie over email, add Callie to your email thread and describe what you need. Callie replies with your available times. Your invitee selects a time, and Callie schedules the meeting.
Step 1 – Add Callie to an email
Open a new email or reply to an existing message. In the To or CC field of the address bar, add callie@calendly.com. Callie does not work in the BCC field.
Step 2 – Tell Callie what you need
Write your message naturally. Callie understands many ways to ask for a meeting:
- "Can we find 30 minutes next week?"
- "Grab time Thursday or Friday afternoon"
- "Schedule a call before the end of the month"
You don't need to be specific. Callie uses your default meeting settings if you don't say otherwise.
Step 3 – Add details if you want to (optional)
You can include extra information to make the meeting more specific:
You can include | Examples |
Date or date range | "Next week," "Wednesday–Friday" |
Time or time range | "Thursday afternoon," "Friday from 10–11:30 a.m." |
Time zone | "Show times in Eastern Time" |
Meeting type and location | "Use my Phone Call event type" or "Switch this one to Google Meet" |
If you don't add these details, Callie uses your default settings.
Step 4 – Send your email
Callie responds within 1 minute with available times. You'll see up to 3 days of availability, with up to 5 time slots each day. The times are based on your calendar and your preferences.
Step 5 – Review and select a time
Callie sends available options to your email recipient. If both you and the person you're meeting with use Calendly, times when you're both free show a green dot.
If they need more options, there is a link to view additional times.
If your Event Type asks booking questions, they will need to select the link to answer them before confirming.
Step 6 – Confirm the meeting
Once your recipient picks a time, Callie sends the meeting invite to everyone. The meeting appears on your calendars right away.
Change details for a single meeting
You don't need to update your Event Type settings to change one meeting. Just tell Callie in your email:
- "Make it a 15-minute call"
- "Switch this one to Google Meet"
- "Share times for Tuesday or Wednesday evening, 6 to 9 p.m."
- "Show availability this Saturday morning"
Callie asks for your approval before making any changes. Nothing updates without your confirmation.
What happens after you book
Once Callie books your meeting, the email thread stays open. The person you're meeting with can reply to reschedule or request changes anytime.
What your invitee sees
The person you're meeting with gets a clear message that Callie is an AI assistant, not a person. They see:
- Available times listed in the email
- A green dot next to times when you're both free (if you both use Calendly)
- Options to:
- Reply with their preferred time
- Select a time from the options shown
- Select a link to view more available times
Before confirming, they'll answer any booking questions and provide a phone number if your Event Type requires one.
Advanced features
Show times in your invitee's time zone
If the person you're meeting with has used Calendly before, Callie may already know their time zone. Callie can show times in their local time automatically.
You can also request this directly: "Share times with Julia in Beijing time."
See mutual availability at a glance
If the person you're meeting with also uses Calendly, Callie detects this. Times when you're both free show a green dot in the email.
You can turn this off in your Callie settings if you prefer.
Book a meeting instantly
If you already know when you want to meet, ask Callie to book it right away:
"Callie, book a meeting with Julia at 5 p.m. next Wednesday."
Callie sends invites to both of you. Your calendars update right away.
Where can I share feedback?
Click "Report an Issue" or "Give Feedback" at the bottom of any email generated by Callie.