

Table of contents
Your calendar should organize your time — not take it up. That’s why we’ve created a quick start guide to setting up a Microsoft Office 365 calendar as quickly and easily as possible.
Whether you use an Office 365 Calendar for work, family, or both, we’ll teach you how to make the most of the app and integrations.
What is Microsoft Office 365?
Microsoft Office 365 has an estimated 47.5% market share of the office productivity software space, probably because of its legacy (which started in 1990) and its suite of products like Excel, Word, Outlook, and a built-in calendar.
Before we get into your calendar app details, let's review Microsoft vocabulary.
Microsoft Office 365 and Microsoft 365 are the same now
Microsoft has a long history with a few name changes for its small business and enterprise tools collection. These name changes mean it's easy to accidentally use an old name for current offerings.
Microsoft Office 365 and Microsoft 365 used to be different things. If it feels confusing, it's because it is. Luckily for all of us, Office 365 is now Microsoft 365, which means you don’t need to try and remember which is which.
The current Microsoft 365 for business can give you access to Microsoft tools including:
Calendar
Microsoft Teams
Outlook
Microsoft Word
Excel
Sharepoint
Windows
Bookings
Forms
Powerpoint
OneDrive
OneNote
Azure Information Protection
While Microsoft's office suite and calendar may change, the way you use it stays the same no matter what you call it.
How to set up your Microsoft Office 365 Calendar
Before you can set up your Office 365 Calendar, you need to create an Outlook account and choose a device to work on.
Create an Outlook ID
There are free and paid ways to access Microsoft’s Calendar, but all of them begin with an Outlook ID. Your Microsoft calendar links to your email account, so you need an email account to use the calendar.
You likely already have an Outlook ID if you use the calendar with other Microsoft Office apps at work. You use the same Microsoft login for all Microsoft 365 apps, like Teams or OneDrive.
If you don’t have an Outlook ID for work yet, or you want to create a free Microsoft 365 Calendar account, follow these tutorial steps to create an Outlook ID:
Visit the Outlook website
Click ‘Create free account’
Choose a name for your email address
Fill out your personal information like name and birth date
Decide where to access your calendar
You won’t always check your calendar at your desk, so it’s nice to have options across devices.
Typically, office applications with calendars are available on:
A website/web app
Mobile apps for Android and Apple mobile devices
Desktop apps downloaded to your computer
The apps you can use to access your Office 365 Calendar depend on your monthly plan.
For example, personal Microsoft 365 plans can access their calendar via an iOS and Android app or the Outlook website. Suppose you want to use Microsoft’s desktop app. In that case, you’ll need at least a Business Standard account, which is a step above the entry-level business pricing. There’s even one monthly plan, Microsoft 365 Apps for business, that doesn’t have calendar access.
Since the apps you can use with your Microsoft Calendar vary by plan, you may want a scheduling app like Calendly to manage your meetings at work or on the go. (More about scheduling apps later.)
Connect and populate your calendar
An intentionally empty calendar is bliss. An unintentionally blank calendar is a project. Let’s review the step-by-step process for getting your information in your new Office 365 Calendar.
Create a new calendar
You can create multiple calendars within your Office 365 Calendar. For example, you might want calendars for different projects and teams, or to keep your personal and private events separate.
It’s important to realize that calendar events only show attendee responses on your primary calendar. That means you’ll have to check your email to know if your invitee said yes to an event on your non-primary calendar.
You still might want to create separate calendars to organize events. While the exact layout of your calendar may look a little different across platforms and devices, the steps you take to create a new calendar are the same:
Go to your calendar
Click ‘Add a calendar’
Click ‘Create blank calendar’
Add details like calendar name and color code
Bonus: You can combine multiple calendars into a group. For example, a customer success manager might want to view calendars for onboarding and customer calls separately from internal team events. To create a calendar group:
Go to your Calendar
Click the three horizontal dots next to ‘My calendars’ on the sidebar
Click ‘New calendar group’
Enter a name for the group
Click and drag calendars under the group name
Import calendar data
You'll want to import calendar data if you're moving to an Office 365 Calendar from another cloud-based service, like Google Calendar or Apple iCloud Calendar. Importing your old calendar will populate your new one with existing events so you can pick up where you left off.
Import Google Calendar data
Go to your Google Calendar settings
Click ‘Import & export’ and then click ‘Export’ below your list of calendars
Navigate to the downloaded file and unzip it by right-clicking the folder
Log into your Microsoft Office 365 Calendar
Click ‘Add calendar’
Select ‘Upload from file’
Click ‘Browse’ and select the file from your computer
Choose a calendar to add the data to
Import iCloud Calendar data
Open the Calendar app on your Mac
Select the calendar you want to download
Click ‘File’ > ‘Export’ > ‘Export’
Log into your Microsoft Office 365 Calendar
Click ‘Add calendar’
Select ‘Upload from file’
Click ‘Browse’ and select the file from your computer
Choose a calendar to add the data to
Link calendars from other platforms
You should link your calendar accounts if you plan to use multiple calendar services going forward. For example, you might use Microsoft 365 for work and Google Calendars for family. However, you still want to see your kid’s soccer schedule on your work calendar.
Share from Google Calendar
Go to your Google Calendar
Click the three vertical dots next to the calendar you want to share
Click ‘Settings and sharing’
Scroll down to the ‘Integrate calendar’ section
Copy the ‘secret address in iCal format’
Log into your Microsoft Office 365 calendar
Click ‘Add calendar’
Click ‘Subscribe from web’
Paste the link to your Google Calendar
Share from iCloud Calendar
Open the Calendar app on your Mac
Select the calendar you want to share
Click ‘Edit’ > ‘Sharing settings’
Copy the URL
Log into your Microsoft Office 365 calendar
Click ‘Add calendar’
Click ‘Subscribe from web’
Paste the link to your iCloud Calendar
Keep in mind that subscribing to a calendar through your Microsoft 365 account gives you view-only access. This means if you share your Outlook calendar with a teammate, your synced events might not show as ‘busy,’ and someone may create an event at the same time as a personal event.
You don’t have time to double enter appointments on your work and personal calendars. And you don’t want personal details of doctor’s appointments and your kids’ activities to show up on your work calendar.
So consider using a scheduling tool like Calendly to connect all of your calendars. Using an independent scheduling app, you can link up to six accounts across popular calendar apps like Google, iCloud, and Exchange to your Calendly account. Then, invitees can view real-time availability based on all of your calendars without seeing your personal calendar data. Using a scheduling app ensures your personal information stays personal, and that your manager won’t invite you to a work meeting when you’ve got a dentist appointment.
Add someone else’s calendar
What if you want to view someone else’s calendar events on your Microsoft 365 Calendar? Ask them to share a link to their calendar following the same steps as the previous section. Then, link it to your Microsoft Calendar.
If you want someone to give you editing access to their Office 365 calendar, they’ll need to update permissions. Here’s how they'll do that:
Click ‘Share’ at the top of your calendar home page
Select the calendar you want to share
Enter the Outlook ID email address of the person you want to share with
Select ‘Can edit’ from the drop-down list
If the person can't share their calendar with you, talk to your administrator about permissions.
Customize your Microsoft Office 365 Calendar
Once you have the basics of your Office 365 Calendar set up, you can customize it.
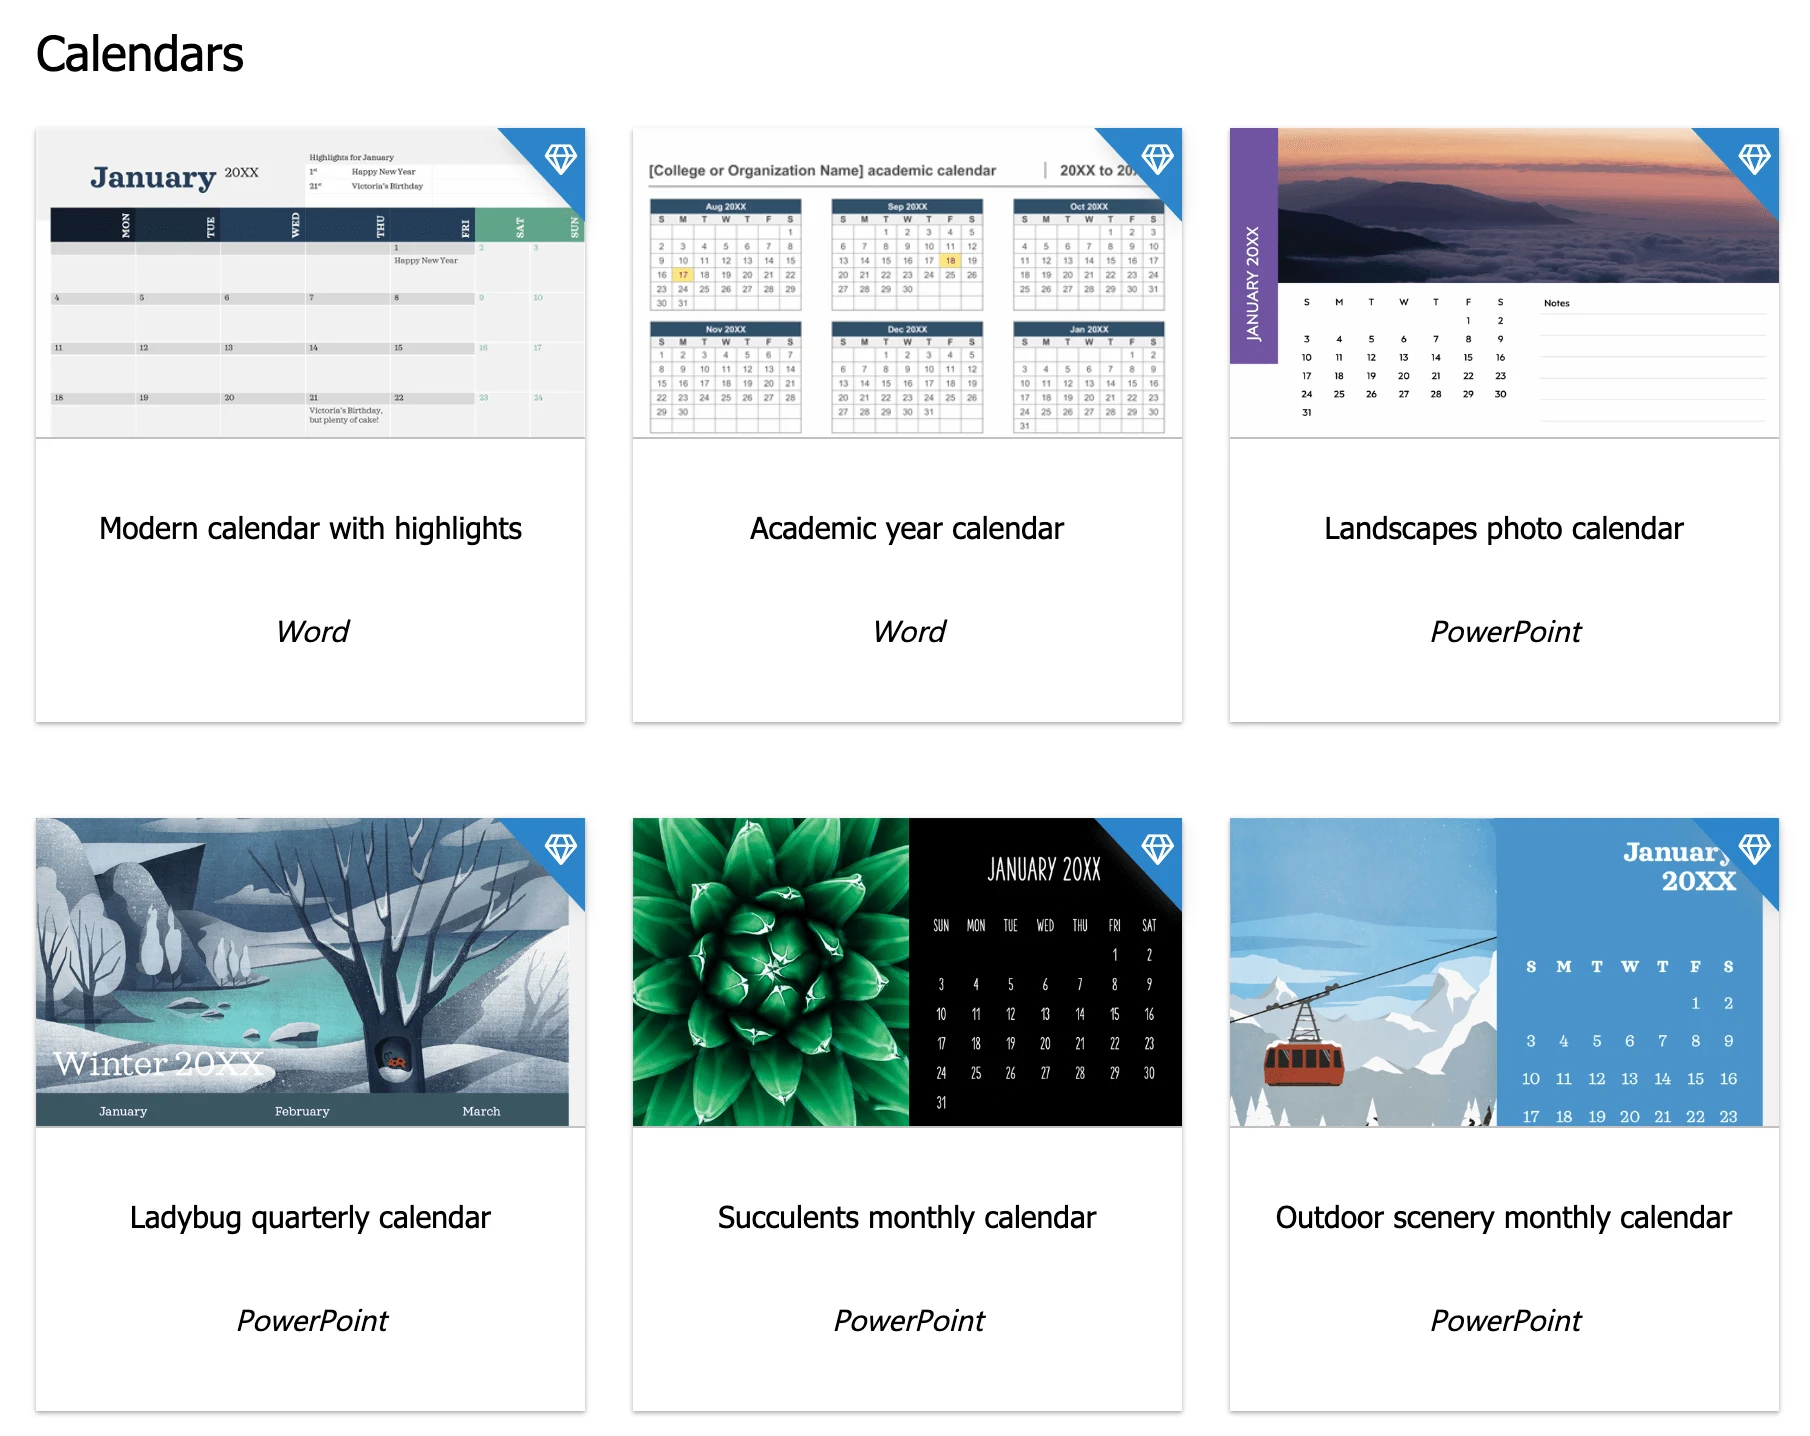
Office 365 users who want to manage a schedule outside the calendar app can use calendar templates. The free and paid templates work within the Office suite, including Excel, Word, and Powerpoint.
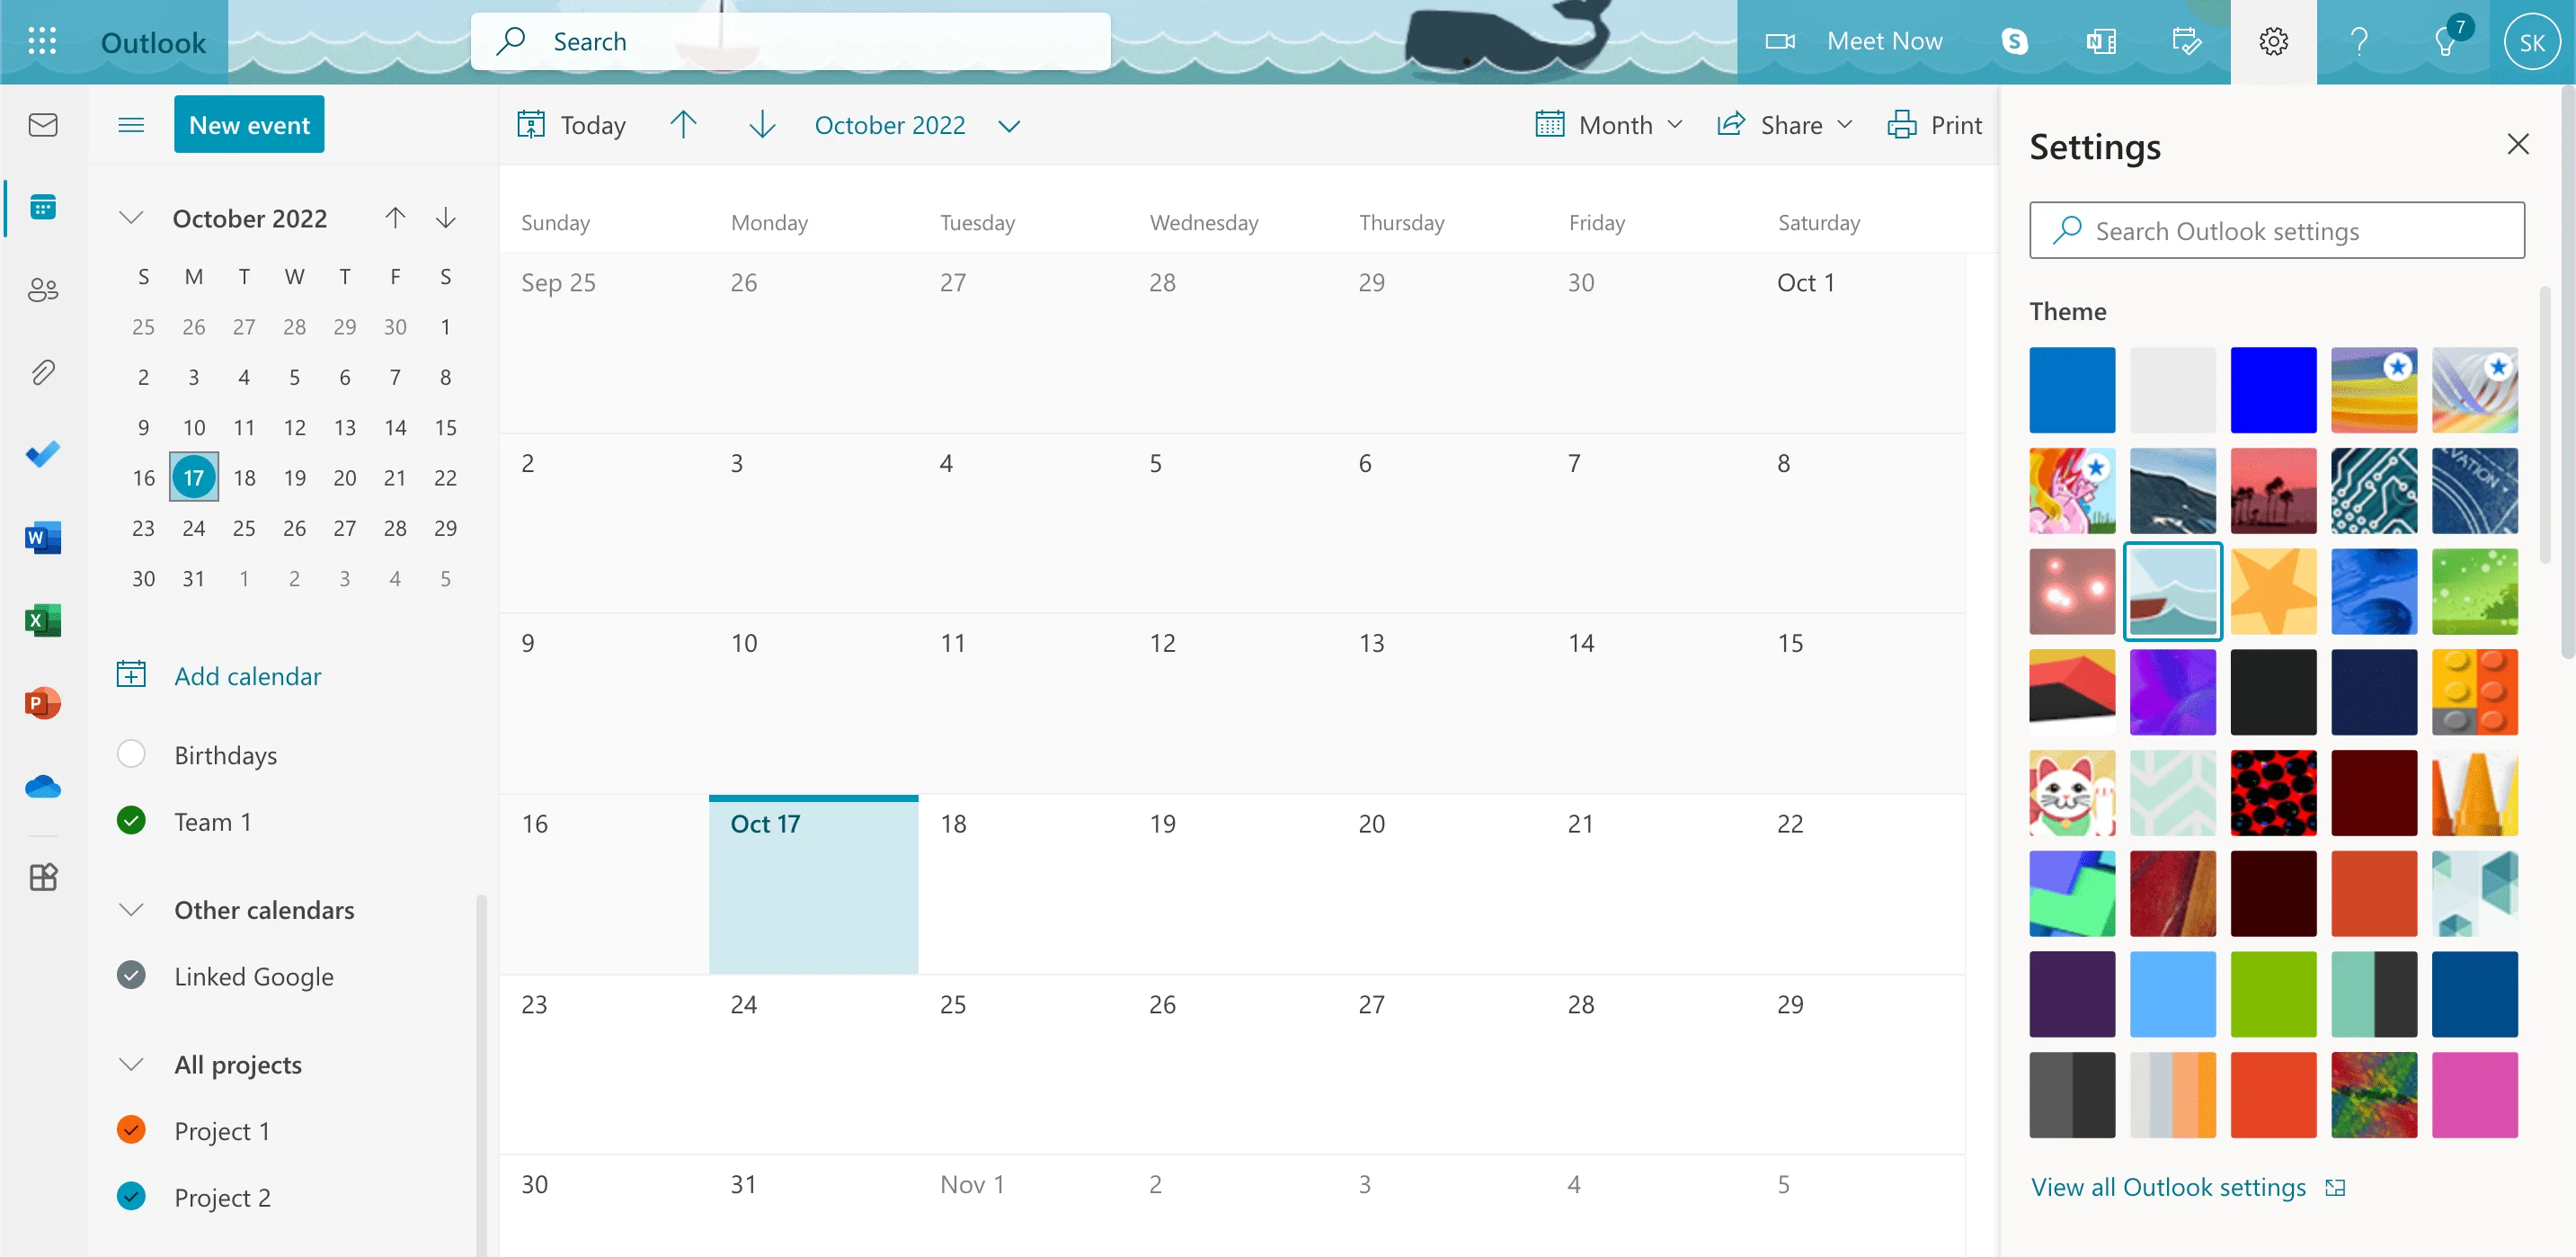
If you want to customize the look of your calendar app, you can apply a theme. To personalize your Office 365 Calendar:
Go to your Office 365 Calendar
Click the gear icon at the top of the page to access your settings
Select a ‘Theme’
Organize your work and collaborate with your Office 365 Calendar
Now that your calendar is set up, you can start adding new events and collaborating with others.
Create events from your calendar
In Microsoft’s world, an ‘appointment’ is a calendar item without attendees, and a ‘meeting’ is a calendar item involving other people. You can create either by using the ‘New Event’ button:
Open your Office 365 Calendar
Click ‘New event’
Fill out event details
Click ‘save’
Alternatively, you can click on the day you want to schedule an event on your calendar, and a new event form will pop up.
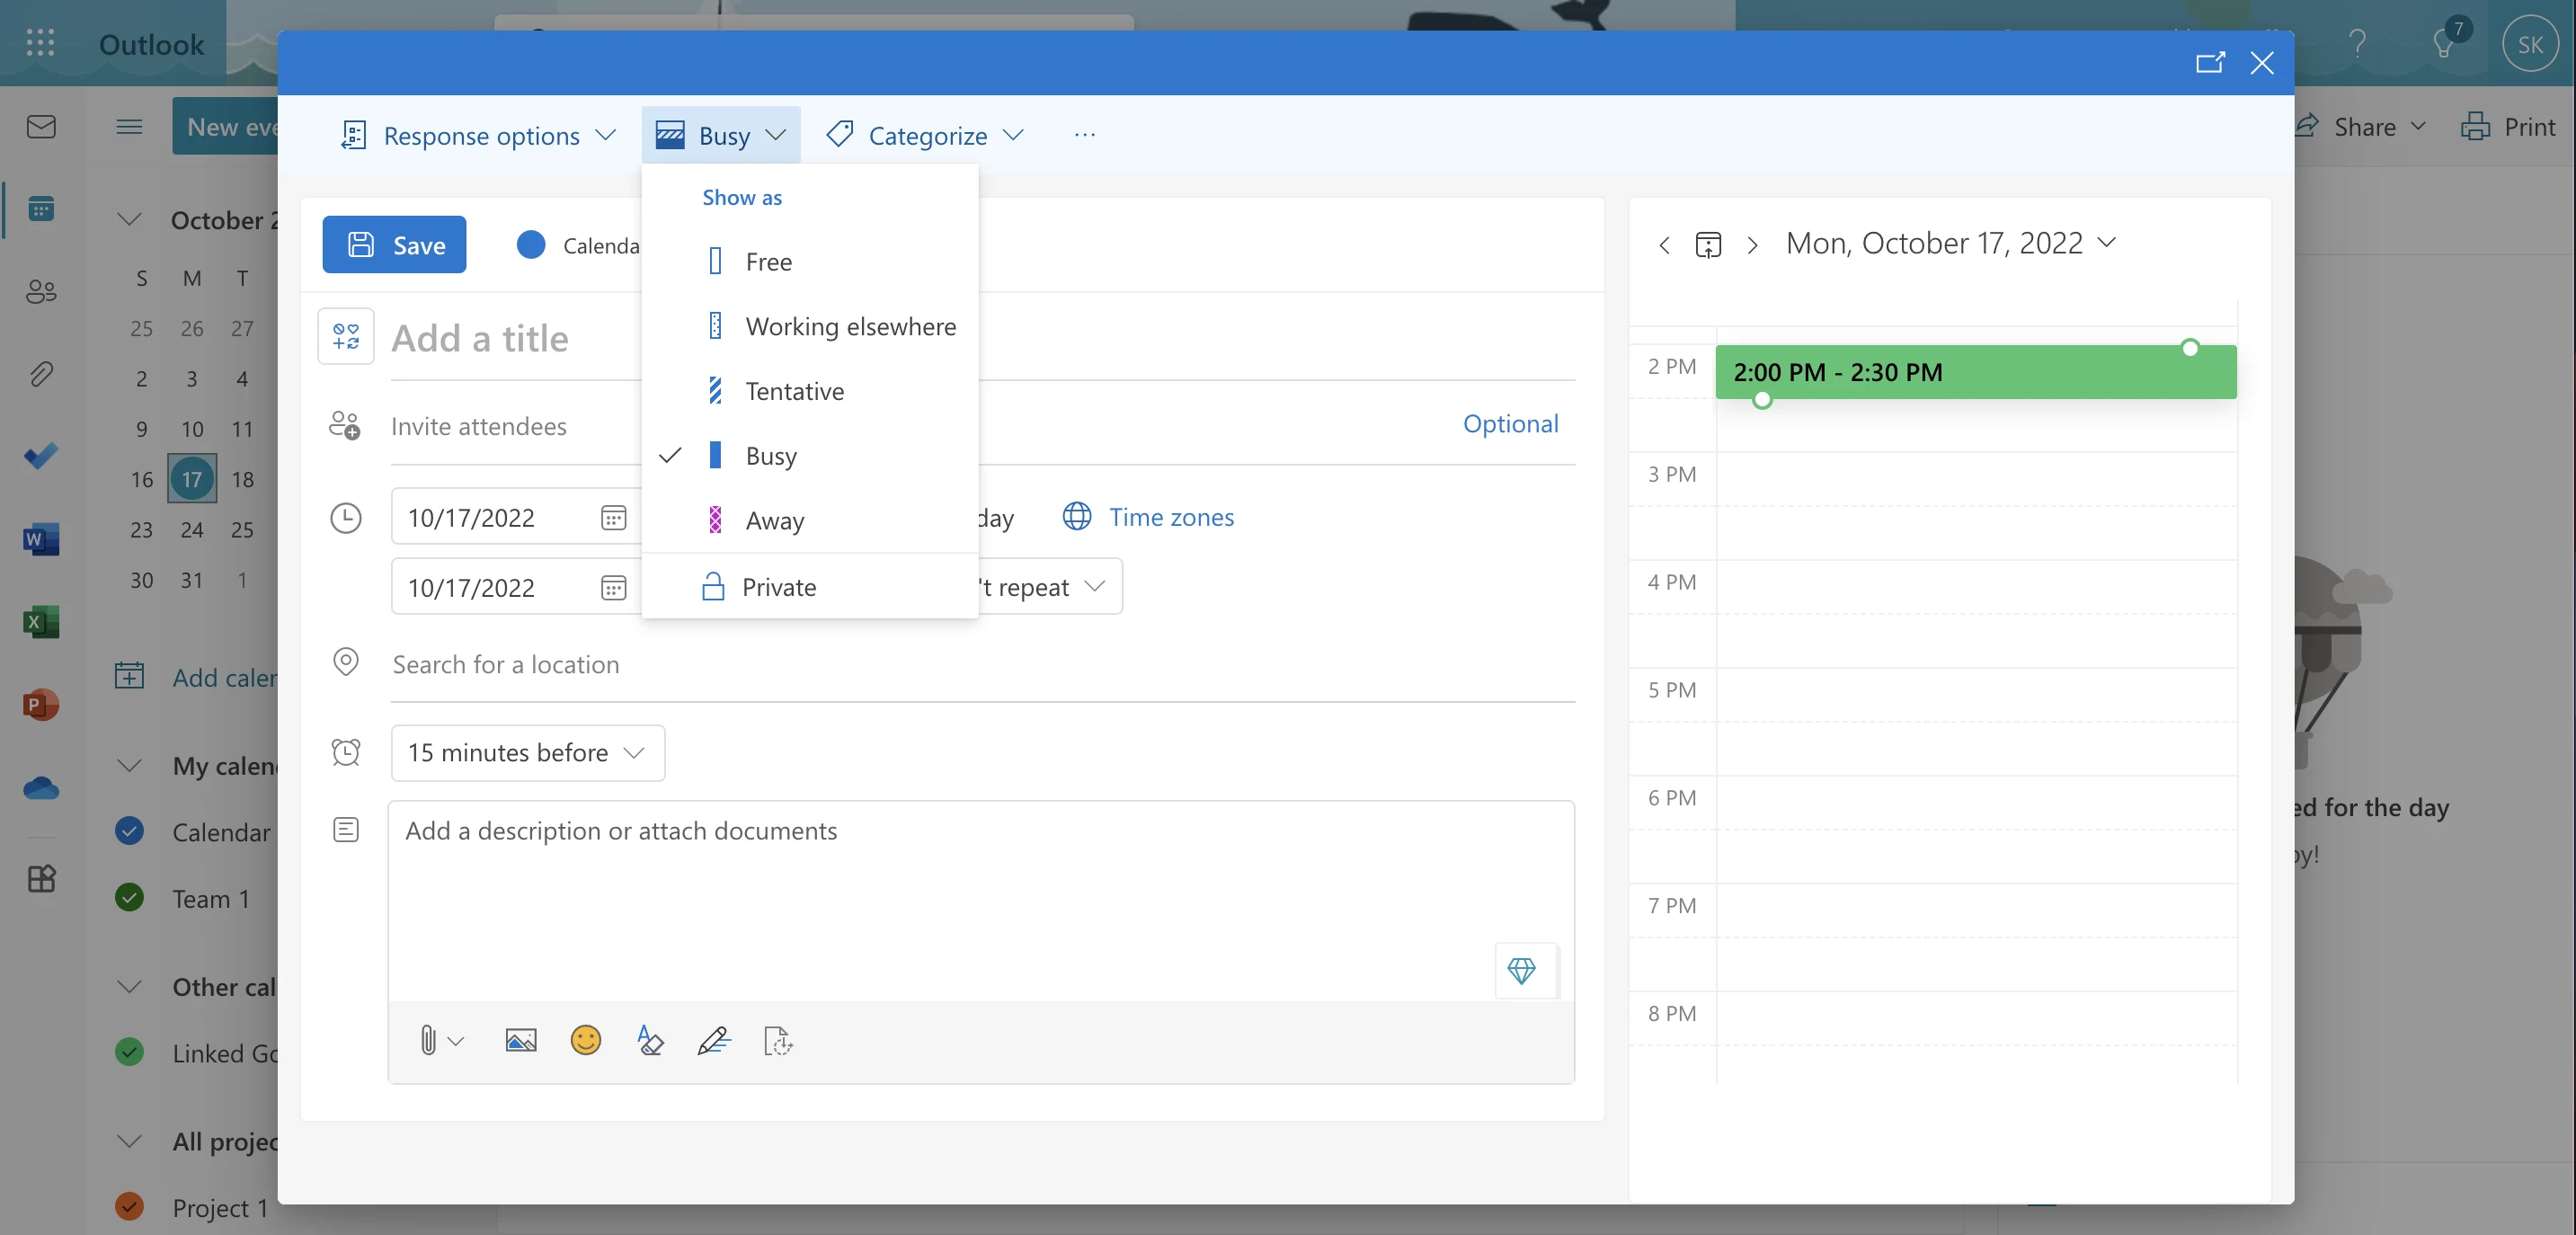
Manage and share availability
You can choose your availability status whenever you create an Office 365 Calendar event. The options are:
Free
Working elsewhere
Tentative
Busy
Away
Private
These event settings are important if you plan to use Microsoft Bookings, a meeting scheduling app in the Microsoft office suite. If you mark a time slot as 'busy,' other people can't create an event on Microsoft Bookings for you during that time.
Just beware that Microsoft Bookings only considers your Outlook Calendar availability, so you risk events overlapping with external calendars. If you want more control over when someone can book a meeting with you, you can use scheduling tools like Calendly to customize your availability and even create custom schedules.
Invite an event attendee
You can add team members, clients, or customers to an event when you set it up or after it’s already scheduled. If you want to add attendees to a new event:
Click ‘New event’ on your calendar
Click ‘More options’ on the event popup window
Enter your attendees’ email address or name in the ‘Invite attendees’ bar
Click ‘Optional’ if you want to invite people whose attendance isn’t required
Click ‘Save’
If you need to add someone to an already-scheduled event:
Click on the event on your calendar
Click ‘Edit’
Click ‘More options’
Enter your attendees’ email address or name in the ‘Invite attendees’ bar
Click ‘Optional’ if you want to invite people whose attendance isn’t required
Click ‘Save’
If you’re using a scheduling tool like Calendly, managing and sharing your availability is even easier. When it’s time to schedule an event, it’s simple to share your availability. Just create an event and send a link for your personal booking page to your attendee.
Edit an event
Surprise! You just got a new project assigned and need to rearrange your schedule. Updating events on your Office 365 calendar is simple:
Click on the event on your calendar
Click ‘Edit’
Click ‘More options’
Update the event information
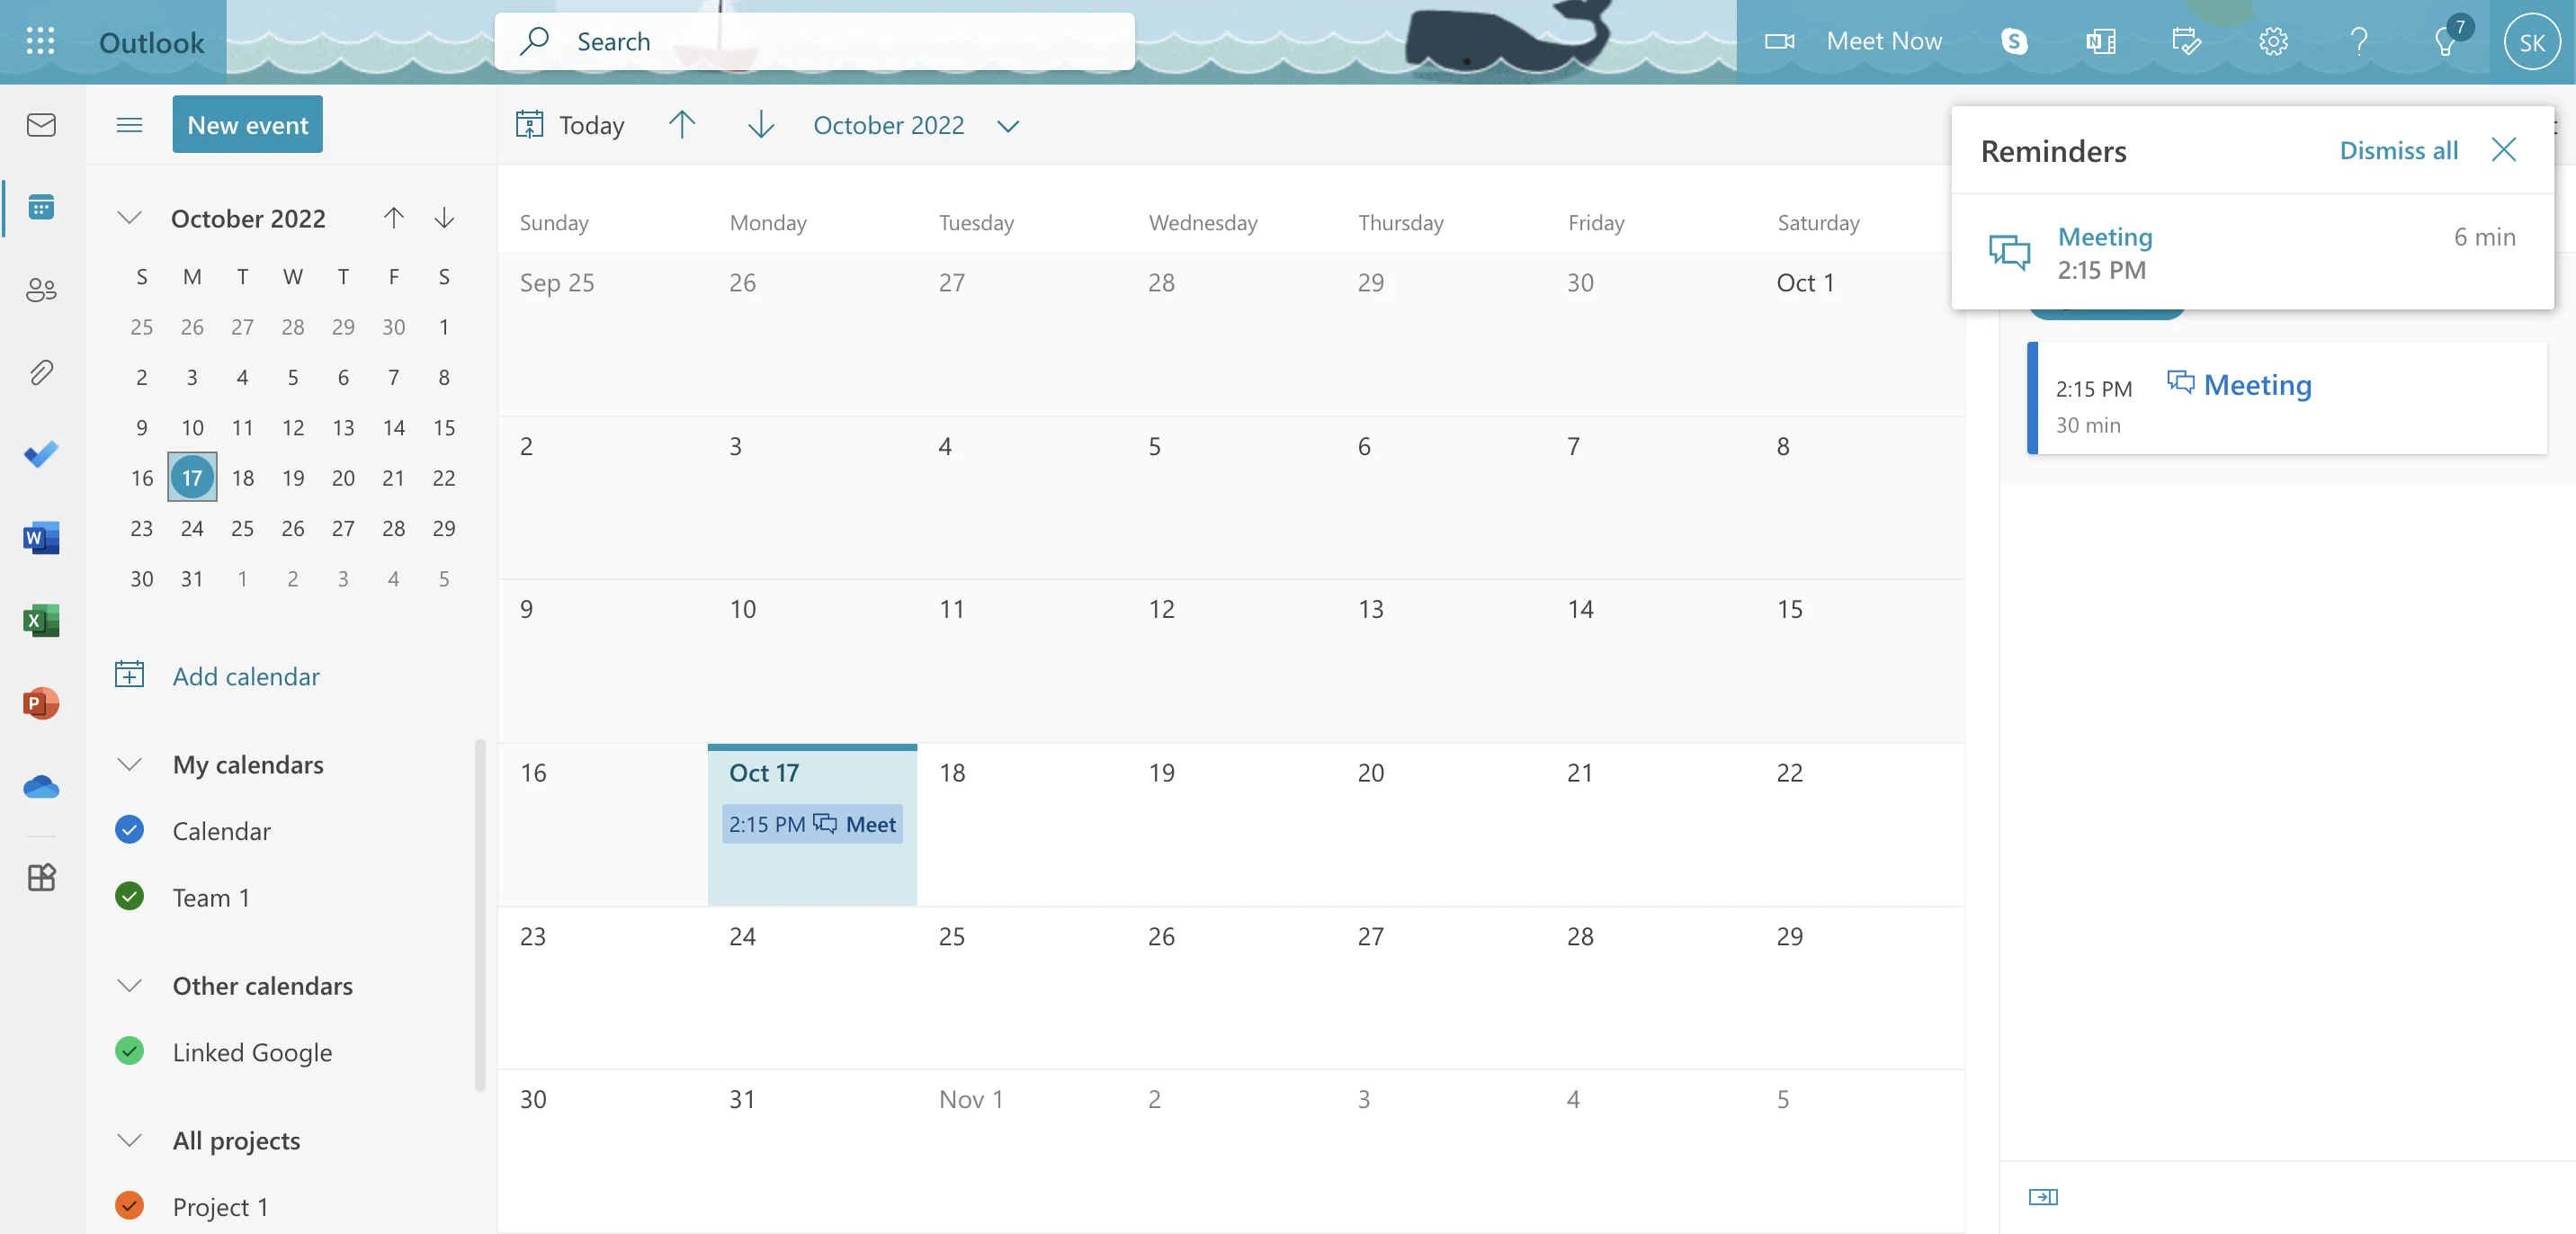
Reminders
Getting events out of your head and onto your calendar frees up mental space for more meaningful work. Of course, it helps to be reminded of what’s up ahead. Your Office 365 calendar automatically reminds you about events before they begin. By default, these reminders only appear in your calendar. If you want to see reminders no matter which tab you’re on:
Open your calendar
Click the ‘Settings’ button
Toggle on ‘Desktop notifications’
If your attendees use an Office Calendar and have desktop notifications turned on, they’ll get a notification, too. But what if your attendee uses a different calendar or steps away from their computer? Scheduling apps like Calendly give you more control with advanced reminders that work in non-Microsoft platforms, via email or SMS text.
Select a location
Each new event will have a Skype for Business or Teams link location, depending on your organization's account. If you and your attendees use those tools, that’s a helpful feature. But what if you’re collaborating with someone outside of your organization? You don’t want attendees scrambling to create an account for a video conferencing tool they don’t usually use moments before your meeting.
Microsoft Teams, in particular, has challenges in inviting external users. It’s best to turn off automatic video conference links if you aren’t sure what tool your calendar will use or what your attendees are comfortable with
If you want to turn off automatic online locations for your meetings:
Open your Outlook settings by clicking the gear icon
Click ‘View all Outlook settings’
Click ‘Calendar’
Click ‘Events and invitations’
Uncheck ‘Add online meeting to all meetings’
Make Microsoft Office 365 Calendar management easier with Calendly
With nearly 5,000 reviews and an average 4.6/5 star rating on G2, the Microsoft 365 suite is a widely used and appreciated resource. Microsoft apps automatically work together, but using some of the calendar features isn’t always the most intuitive.
“Sometimes, it's not always obvious to find the action that you need," wrote a library assistant named Laura D. It took me a couple of tries to find the calendar app via email. There was one tab up above that said ‘meeting’ so I thought, ‘great that must be it’ but then it wanted me to send an email to the person I was just corresponding with and ask to schedule a meeting with him.”
After the Microsoft learning curve, you also have to contend with the fact that not everyone you interact with works in the Office 365 ecosystem. Setting up video conferencing and events with people outside your organization can be difficult.
Whether you use your Office 365 Calendar because you want to or have to for work, consider using Calendly’s Outlook integration to make scheduling more intuitive and inclusive.
Calendly is an all-in-one tool that lets you share availability based on all of your calendars, quickly schedule events, and give attendees more video conferencing options, including Zoom, Webex, and GoTo Meeting. When you schedule a meeting with Calendly, the app automatically alerts attendees if you cancel or reschedule, and gives you more control over when and how invitees get meeting reminders. If you don’t have a personal assistant to manage your calendar, adding the Calendly integration to your Outlook calendar is the next best thing.
Get started with Calendly
Related Articles
![[Blog hero] 11 best scheduling software for companies of all sizes](https://images.ctfassets.net/k0lk9kiuza3o/4Dd8pqKyMBADAbAAQ1aN1h/aaea98d8f3f7198564a83e3df4b30d7e/Calendly-blog-best_scheduling_software_companies.png?q=85&fm=webp)


Don't leave your prospects, customers, and candidates waiting
Calendly eliminates the scheduling back and forth and helps you hit goals faster. Get started in seconds.
Calendly eliminates the scheduling back and forth and helps you hit goals faster. Get started in seconds.